


The Ultimate Guide to Crystal-Clear, Durable Coatings
Are you looking for a crystal-clear, scratch-resistant finish to protect and enhance your artwork, countertops, or wooden furniture? Meet Craft Resin Table Top Epoxy Resin, the latest addition to our epoxy resin lineup. This ultimate guide will walk you through everything you need to know about this high-gloss, durable coating – from its standout features and uses to step-by-step application instructions, comparisons with other resin types, and pro tips for achieving flawless results.

Key Features of Table Top Epoxy
Craft Resin Table Top Epoxy is specially formulated for protective surface coatings. Here are its standout features and benefits:
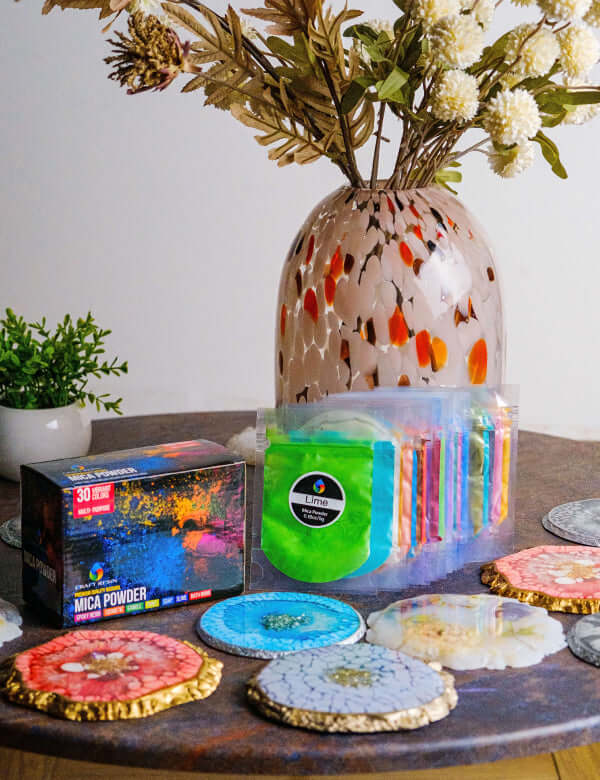
- Crystal-Clear, High-Gloss Finish: Cures to a brilliant glass-like surface that enhances colors and details underneath without any haze or cloudiness. Perfect for bar tops, tabletops, artwork, and photographs.
- Extremely Durable & Scratch-Resistant: Forms a hard, rock-solid layer that protects surfaces from scratches, spills, and everyday wear. Once cured, the coating is heat-resistant (up to ~80°C/176°F) and highly impact resistant, making it suitable for functional pieces like coffee tables and countertops.
- UV Resistant & Non-Yellowing: Engineered with UV inhibitors to resist yellowing over time. Your coated pieces stay crystal clear and won’t develop the amber tint that inferior resins can show after sun exposure.
- Food Safe Once Cured: Craft Resin Table Top Epoxy is formulated to meet rigorous safety standards. When fully cured, it’s non-toxic and food-safe, so you can confidently coat serving trays, countertops, or cutting boards* (indirect food contact) without worry.
- Self-Leveling Formula with Bubble Release: This resin has a high viscosity and self-leveling properties, which means it will naturally even out across your surface. It’s designed to minimize bubble entrapment; any small bubbles that appear can be easily removed with a quick pass of a heat gun or torch.
- User-Friendly 1:1 Mix Ratio: The resin and hardener mix in equal parts (by volume), simplifying the measuring process. The kit comes with detailed instructions and essential tools, making it beginner-friendly. Whether you’re a first-timer or a seasoned crafter, you’ll find the mixing and application straightforward.
- Versatile Application: While ideal for thin coatings on surfaces like wood, concrete, canvas, and photos, this epoxy can also be used for small casting projects (coasters, jewelry) up to about 1/8-inch thick per pour. It’s a true multi-purpose resin for a variety of DIY projects.
*Note: “Food safe” means the cured resin surface will not leach harmful chemicals and is safe for incidental contact with food. It is still not recommended for cutting directly on the epoxy surface.

How to Use Craft Resin Table Top Epoxy Resin
Using Table Top Epoxy is straightforward, but proper technique ensures the best results. Follow these steps to achieve a smooth, glass-like finish:
- Prepare your workspace and materials: Work in a clean, dust-free area with a stable room temperature of around 72°F (22°C). Cover your work surface with plastic or drop cloths to catch drips. Assemble all necessary tools and supplies: mixing cups, stirring sticks, gloves, a leveling tool or spreader, and a heat gun or torch for bubble removal. Always wear disposable gloves and ensure proper ventilation when working with epoxy.
- Measure resin and hardener accurately (1:1 ratio): Measure equal parts of Resin (Part A) and Hardener (Part B) by volume. For example, if you need 8 ounces total, mix 4 oz resin with 4 oz hardener. Use separate clean measuring cups to ensure the ratio is exact. **Tip:** Avoid mixing more than you need for one coating layer – large volumes of mixed epoxy can overheat due to the exothermic reaction.
- Mix thoroughly but slowly: Pour the resin and hardener into a larger mixing cup and stir them together gently for about 3-5 minutes. Scrape the sides and bottom of the cup as you mix to incorporate all material. Stirring slowly helps reduce the introduction of air bubbles. The mixture should turn clear (no streaks) when fully combined. **Note:** Proper mixing is critical to ensure the resin cures correctly.
- Pour and spread the epoxy: Immediately after mixing, pour the epoxy onto your prepared surface. If you’re covering a large surface like a table, you might start with a thin “seal coat” (spread a small amount to seal porous surfaces) and then follow with a thicker flood coat. The resin will self-level; you can help it reach edges or cover areas using a plastic spreader or foam brush. Keep the layer at approximately 1/8 inch (3 mm) thickness for best results. Do not exceed the recommended thickness per layer, or the resin may not cure properly.
- Eliminate bubbles: After pouring, you will notice some air bubbles rising to the surface. Wait about 5-10 minutes to allow most bubbles to come up, then gently pass a heat gun or propane torch over the surface. Keep the heat source a few inches above the resin and move it quickly to avoid burning the resin. The warmth will **pop bubbles** and leave the coating crystal clear. (Be careful not to overheat or stay too long in one spot.)
- Let it cure: Protect the freshly coated piece from dust while it cures. Cover it with a clean plastic tote or cardboard box (make sure it doesn’t touch the resin surface). Craft Resin Table Top Epoxy will begin to gel in about 30-40 minutes, be tack-free (initial cure) in around 6-8 hours, and fully cure to hardness in roughly 36-48 hours (at 70°F). Avoid moving or using the item until full cure is reached. If a second coat is desired for extra thickness, you can pour it after the first layer has hardened enough to be tacky (or lightly sand the first layer if it has fully cured, then pour the next).
- Clean up and finish: Dispose of mixing cups and sticks properly (the leftover resin will harden in the cup). Remove tape (if you masked off edges) while the epoxy is in a gel state to get clean lines. You can sand any drips or uneven edges after full cure. For an ultra-gloss finish, you may also buff or polish the surface once it’s completely cured. Now step back and admire the glossy, clear coat you’ve created!

Helpful Resources: Not sure how much resin you’ll need? Use our Resin Coverage Calculator to estimate the required amount based on your project’s dimensions. For more general usage guidelines, check out our Epoxy Basics Guide.
Comparison: Table Top vs. Other Epoxy Resins
Craft Resin offers several types of epoxy resin, each tailored to different applications. How does the new Table Top Epoxy differ from our original Arts & Crafts Resin and our Deep Pour Resin? The table below highlights the key differences and best use cases for each:
| Characteristic | Table Top Epoxy | Arts & Crafts Epoxy | Deep Pour Epoxy |
|---|---|---|---|
| Mix Ratio | 1:1 by volume | 1:1 by volume | 2:1 by volume |
| Viscosity (Thickness) | High (≈3800 cps) – thick syrup-like for coating | Medium (≈1400 cps) – versatile for art & coatings | Low (≈600 cps) – very fluid for deep casting |
| Max Layer Thickness | ~1/8″ (3 mm) per pour | ~1/4″ (6 mm) per pour | Up to 2″ (5 cm) per pour |
| Working Time (Pot Life) | Approx. 30–40 minutes | Approx. 40 minutes | Up to 90 minutes |
| Full Cure Time | 36–48 hours | 24 hours | 48 hours |
| Heat Resistance | Up to ~176°F (80°C) | Up to ~203°F (95°C) | Up to ~176°F (80°C) |
| Best For | Surface coatings on bars, tabletops, counters, artwork (high gloss, high durability finish) | Artwork, crafts, & smaller casts (coasters, jewelry, canvas art, where bubble-free clarity and faster cure are needed) | Deep molds & pours (river tables, thick castings, embedding large objects in a single pour) |
In summary, **Table Top Epoxy** is the go-to for a tough, glossy coating on flat surfaces, **Art & Craft Epoxy** (our original resin) is great for creative projects and general use up to about 1/4″ thick, and **Deep Pour Epoxy** excels at filling large volumes in one go. Many resin artists use these in combination – for example, casting a river table with Deep Pour resin for the thick sections, then finishing with a hard Table Top Epoxy coat for maximum surface durability.
Tips for Best Results
Even with a great resin product, a few best practices can make the difference between a decent result and a stunning one. Keep these tips in mind when working with Craft Resin Table Top Epoxy:
- Mind the temperature: Epoxy likes warm (but not hot) conditions. Aim for 70–75°F (21–24°C) ambient temperature and keep your resin bottles at a similar temperature before mixing. Cold resin can be thick and create more bubbles, so if your resin is chilly, warm the sealed bottles in a lukewarm water bath for 10-15 minutes before mixing.
- Seal porous surfaces first: Materials like wood and concrete can release air bubbles into epoxy. Apply a thin seal coat of mixed epoxy to porous surfaces and let it cure until tacky. This seals off the pores and prevents excessive bubbling in the subsequent flood coat.
- Avoid mixing too much at once: Large batches of resin can overheat quickly due to the chemical reaction. If you need a lot of epoxy for a project, consider mixing multiple smaller batches rather than one big batch. This gives you more working time and helps prevent the resin from curing prematurely (or even smoking!) in the mixing cup.
- Work efficiently: Once Part A and B are mixed, the clock is ticking. Have your workspace ready so you can pour and spread the resin immediately after mixing. Delaying can shorten your effective working time as the resin thickens.
- Use the right tools for bubble removal: A small culinary torch or a heat gun is ideal for removing bubbles. Avoid using a hair dryer – it doesn’t get hot enough to pop bubbles and can blow dust onto your piece. Remember to keep flames moving and never in one spot.
- Protect your pieces while curing: Dust is your enemy during cure. After pouring, cover your project with a clean container or tent it with plastic sheeting. Ensure there is space for air to circulate, but the cover should stop any dust or insects from landing in the wet epoxy.
- Be patient with full cure: The resin might be hard to the touch overnight, but for heavy use items (like a tabletop that will get a lot of wear or hold hot cups), allow a few days to a week of curing. Epoxy continues to cure and strengthen over time (a process called post-curing), so waiting ensures maximum hardness and heat resistance.
- Safety first: Although Craft Resin epoxies are low-odor and VOC-free, it’s wise to wear gloves and ensure ventilation. If you’re sanding or machining cured epoxy, wear a dust mask to avoid inhaling fine particles. Always read the safety data sheet for any resin product if you have sensitivities or want detailed handling precautions.
Conclusion

Craft Resin Table Top Epoxy Resin opens up new possibilities for creators who demand a clear, durable finish on their projects. Its specialized formula provides the strength and clarity needed to preserve surfaces beautifully, whether you’re protecting a wooden bar top or adding a glossy coat to a piece of artwork. By understanding how to use it properly and choosing the right resin for each aspect of your project, you can achieve professional-quality results with ease.
We hope this ultimate guide has answered your questions and given you the confidence to dive into your next resin project. With the tips and information provided, you’re well-equipped to create stunning, long-lasting pieces. Happy crafting! And remember, if you ever need further guidance, our Craft Resin FAQs and customer support team are here to help.
