


Sealing Wood with Wood Epoxy Resin:
Under the right conditions, epoxy resin can show off wood and it’s natural appearance in a fresh modern way. Epoxy resin can be used for wood in different variations to optimise its aesthetic and functional benefits. If you work carefully, you can seal wooden surfaces with epoxy resin or simply fill gaps in the wood with the resin. This protects the wood against moisture from the outside and makes it more resistant to mechanical stress.
Possible examples of epoxy resin applications of this kind are:
- Furniture with elements or complete parts made of epoxy resin
- Covers for the kitchen area
- Coatings for wooden floors
- Tabletops for dining tables, desks or living room tables
- Cutting boards for use in the kitchen
For a high-quality end product, in addition to the materials used and a careful approach, the working environment plays a significant role: Ideally, you should find a place that not only offers you enough space, but is also dust-free and as dry as possible. In addition, the materials used should be stored for a while at the place where they will be used before starting work. This way the wood and the epoxy resin have the same temperature as your workplace and there are no undesirable reactions due to excessive temperature differences.

Step by step instructions to work with Wood and Resin:
In order for the epoxy resin to bond optimally with the wood, you should consider a number of factors. First of all, the wood surface must be as clean and dry as possible. However, it should also not be sanded extremely smoothly. This is because a certain roughness promotes the adhesion between the resin and the wood surface used as the substrate. What you should definitely remove beforehand are residues and impurities like grease, oil, wax, or similar substances on the wooden surface.
The substrate should not only be clean but also under 12% moisture content. You can ensure this is the case by using a wood moisture meter, or guesstimate it and dry it out with a heat gun or hairdryer which you can use to dry the surface as carefully and slowly as possible. When the wood surface is sufficiently dry, it can be sanded with a suitable random orbital sander (which will be a lot quicker) or even by hand with standard sandpaper. With oily woods such as teak or olive wood, you can improve the adhesion between resin and wood by degreasing the surface chemically with some acetone.
Dust that is already present or that has been created by sanding can easily be removed with a vacuum cleaner or a hand brush. Then moisten a lint-free cotton cloth with a suitable solvent and gently wipe the surface with it. Make sure that you do not touch the surface with your bare hands afterward. Otherwise you could contaminate it again with tiny traces of body oils, which in turn could cause defects in the adhesion of the resin to the wood surface.
It is also necessary to limit the flow area for the casting process of the epoxy resin, so that no material can run over the edge of the surface to be processed. For this purpose, in most cases, you will need to apply a suitable barrier around the surface to be sealed. We recommend high-quality adhesive tape, which has proven to be relatively stable, for this use, for example Tuck Tape. Correctly applied, it usually withstands the relatively low pressure of the liquid resin and can be removed again relatively easily. However, before you can start the casting process, the prepared surface should be levelled by placing wooden blocks or other aids underneath. If you use a spirit level, it should be no problem to achieve an even layer thickness of the epoxy coating at all points. You can buy ready made molds for casting wood resin projects from places like @makersreusablemold, these can even be reused again and again, and although an initial outlay, may be worth it if you are going to create multiple projects of the same size.
To avoid wasting excess resin, it is advisable to calculate the exact amount of epoxy resin needed before the actual casting process. So that you do not have to spend a lot of time calculating, you can simply use our special Craft Resin epoxy resin calculator. Be careful as there is hardly anything more annoying than suddenly being left with too little material in the middle of work. That’s why you should always round up and mix a bit more rather than too little.
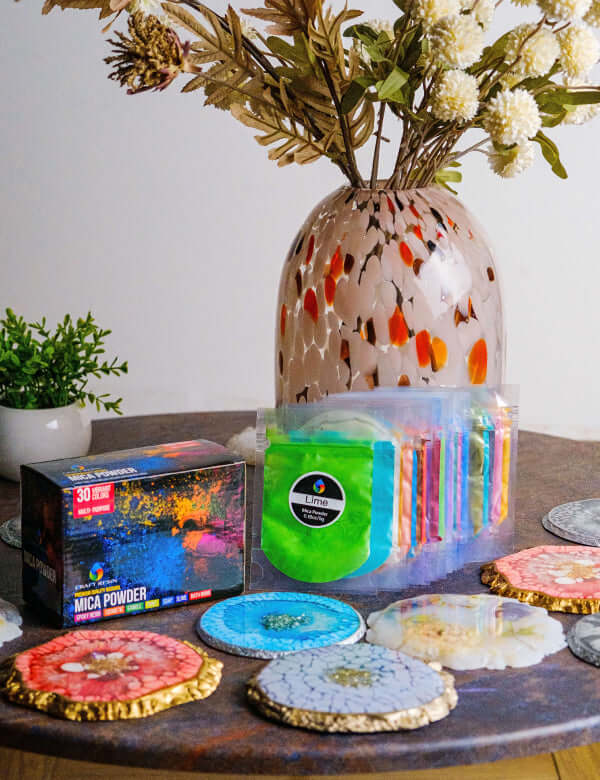
The correct mixing of epoxy resin and hardener has a decisive influence on the final result. Although these two components should be mixed very thoroughly, at the same time not too many air bubbles should be mixed into the material. During the mixing process, you can also colour the epoxy resin with special colours should you so wish. There is a wide range of possible materials available for this purpose. These ingredients each have their own individual advantages and disadvantages, please research this before you begin. We do have Mica Powders available on our website as one option you could choose to colour.

In order for the epoxy resin to spread as evenly as possible on the wood surface to be sealed, you should first pour the mixture in a spiral or zigzag shape starting from the centre of your work-piece. In order for the epoxy resin to really run together, the pouring process must be repeated from time to time. After the actual pouring, you should level the surface for a few more minutes to make it smooth and even.
Different types of epoxy resin remain relatively liquid for different lengths of time after mixing. With a little practice and the experience that comes with it, you will find out how long you can use this time window for the distribution of the liquid and for working on the surface. Basically, you should not waste time to achieve the desired material thickness. Once the chemical reaction of the resin enters the phase of the gel and rubber-like state, you should not work on its surface any further.
As a rule, after the epoxy resin has been applied to a surface, air bubbles will almost always rise in the mixture. These can be removed by targeted heating with a heat gun. However, you must not aim at a specific area for too long, otherwise the mixture could become too hot. Find out more about this exothermic reaction on our website. The heat causes the air bubbles to rise to the surface, where they burst.
If this is desired or necessary after the first layer has set and before the first layer has completely hardened, a second layer can be applied directly to it without having to sand it down again. As a rule, this time window covers a period of between 3-5 hours. If the second layer is applied directly within this time window, optimum adhesion is ensured by a chemical bond between the two layers. Any longer than this and you will need to wait for your project to cure and then sand down the resin layer so adding the next will then bond to the first.
To ensure that the last remaining epoxy resin mixture has dried, it must be allowed to cure for at least 24 hours. Covering with a sufficiently large board has proven to be a good way of preventing the surface from being contaminated during this period. It doesn’t matter if you use a plastic or cardboard plate, as long as it covers the cast epoxy resin layer as perfectly as possible. Only if the plate is very close to the coating without direct contact can it effectively shield all kinds of dirt or lint. How long it finally takes for the cast resin to really cure completely depends on the material used and, to a large extent, also on the thickness of the cast layer. You can usually find information on this right on the packaging of the components used or from the resin brand you are using.
Once the resin is fully cured you can then de-mold your work. You may need to tidy it up by sanding the whole piece again and then depending on what you have created you may need to treat your work to ensure the project is food safe, if for example you have made a wood/resin chopping board. Depending on what country you are in you will need to do more research into what you can get in the market you are in that will help finish your work.
We are currently working on Craft Resin courses in which we have a full Wood/Resin Chopping Board course. This will be released in a few months time, so watch this space if you would like to learn from a professional Wood/Resin Artist on how to create this specific project.

